Friday, August 24, 2012

Written Wrapping

This is one of those tricks that turns really inexpensive materials into something really special.


I hate keeping around piles of wrapping paper.  To have themed paper for every occasion just adds up to a ginormous quantity.


So I just use that kraft postal wrap.  Yes, I know, it is super trendy and everyone is using it right now.  But there is some good sense behind this trend.  You can get a huge roll of the stuff for not much money.  I would recommend buying your rolls during the summer.  If you try to buy during the holidays, it will become a knife fight between you and several other people as you fight for the last roll.  No joke, this stuff evaporates by Thanksgiving and then all the hipsters who did not plan ahead start panicking as they realize they will have to use mainstream wrapping materials.  Much gnashing of teeth ensues.

You can decorate your papers to fit the occasion.  Generally, if I am going to decorate the paper, I will not go crazy with ribbons and other decorations, but more on wrapping for another post.


Today, I am just going to do written decoration and save stamping for another day.  You can use markers, pens, anything really.  To be honest, you don't even need to have nice handwriting.  Personally, I think that this is one of those occasions where more sloppy script looks more natural and so the sentiment seems more earnest.  I would say, though, that if your writing is illegible, then remember it is going to turn into a pattern as opposed to written communication.  But this is a good opportunity to practice one's penmanship.  Maybe even practice your 'kid' handwriting, which is something I struggle on.

I am using China ink and watered down acrylic paint as my inks and a brush as my stylus for this batch of paper.


It's pretty basic, just roll out a stretch and start writing.  Just make sure that you are making enough for whatever you need to wrap.

Sometimes I like to write out a poem that I know will be special to the recipient, but you really can't go wrong with just an 'I love you'.


Thursday, August 23, 2012

Lithops

Today is a big day.  I am officially calling it the 'new year' for the new growing cycle for my Lithops.


Each year, a new pair of leaves emerge on a Lithops.  This year, there are TWO pairs!!  I am thrilled.  Well, I am just thrilled any time something isn't dying under my watch.  This particular Lithops I think is a karasmontanas var., but I can't be totally sure because I purchased it unidentified.  This little guy, guys now, are planted in carnelian and agates that I have been collecting from my local beach.  Since Lithops are generally colored to match the surrounding rocks in their natural habitat, I wanted to try to make a gesture towards authenticity.  Just for this once anyway.


It isn't good news for all my Lithops, though.  Karasmontanas' next door neighbor (above) is slowly dying.  I bought it from a very commercial, cheap distributor who planted it in improper medium.  Instead of being in a fast draining rock mix, it was in potting soil with a bit of sand.  As such, I had been avoiding watering them.  Now it is starting to shrivel, which means it needs water.  So I tried to remove as much of the old soil as possible and replant them in my own substrate (combination of pumice pebbles and shell) before watering.  I am afraid that there is still too much of the old soil left on the roots and so it is holding onto the water and rotting the roots.  We'll see if they can bounce back.


Plants can just be so mysterious sometimes.  I have spent months watering and watching my Pachypodium rosulatum, waiting for something to happen.  I had one new leaf last month.  That's it.  But I was looking at it today and noticed all these new little branches starting to form.  No idea how that is going to work out as the growing season is almost over.  In another month or so, there will be no more watering until spring.  This guy is perched in a mound of fossilized coral.  I wish I had more of it, but this is the last of my stock pile from when I lived on the East coast.

At the suggestion of my friend and planting guru, Emily Stuart (see footnotes), I have started keeping a plant journal.  Since all my plants seem to have very specific growing needs and are all running on different calenders, I need to keep a record of their life cycles.  With a lot of these specimen succulents, they don't live by the seasons where you live, but by the seasons and climatic cycles from where their species originated.  And then some of them seem to hate on their growers.  Nothing like being rejected by a house plant.


Read more from the famous Miz. Stuart:
http://natureassassin.blogspot.com/

Wednesday, August 22, 2012

Goes together like bread and butter

I have a few friends that I exchange shall we say, unusual gifts with.  Keeping things original and obscure can be a challenge sometimes.  The stakes are even higher when the gift is for some big life event.


So when confronted with an appropriate wedding gift, some thought was required.  I always like giving blankets; they are just a physical manifestation of warm, fuzzy thoughts, you know?  And so I made the toast blanket.


But as this was for a wedding, I included a floor pillow in the form of a pat of butter.  No judgement on who is who.


I also figured that the butter would work as a sleeping pillow for their cat, but as expected, the cat was more interested in sleeping on the wrapping paper than on the bed.  Why cat, why?  Why do you shun my attentions??

Tuesday, August 21, 2012

Sheep Update

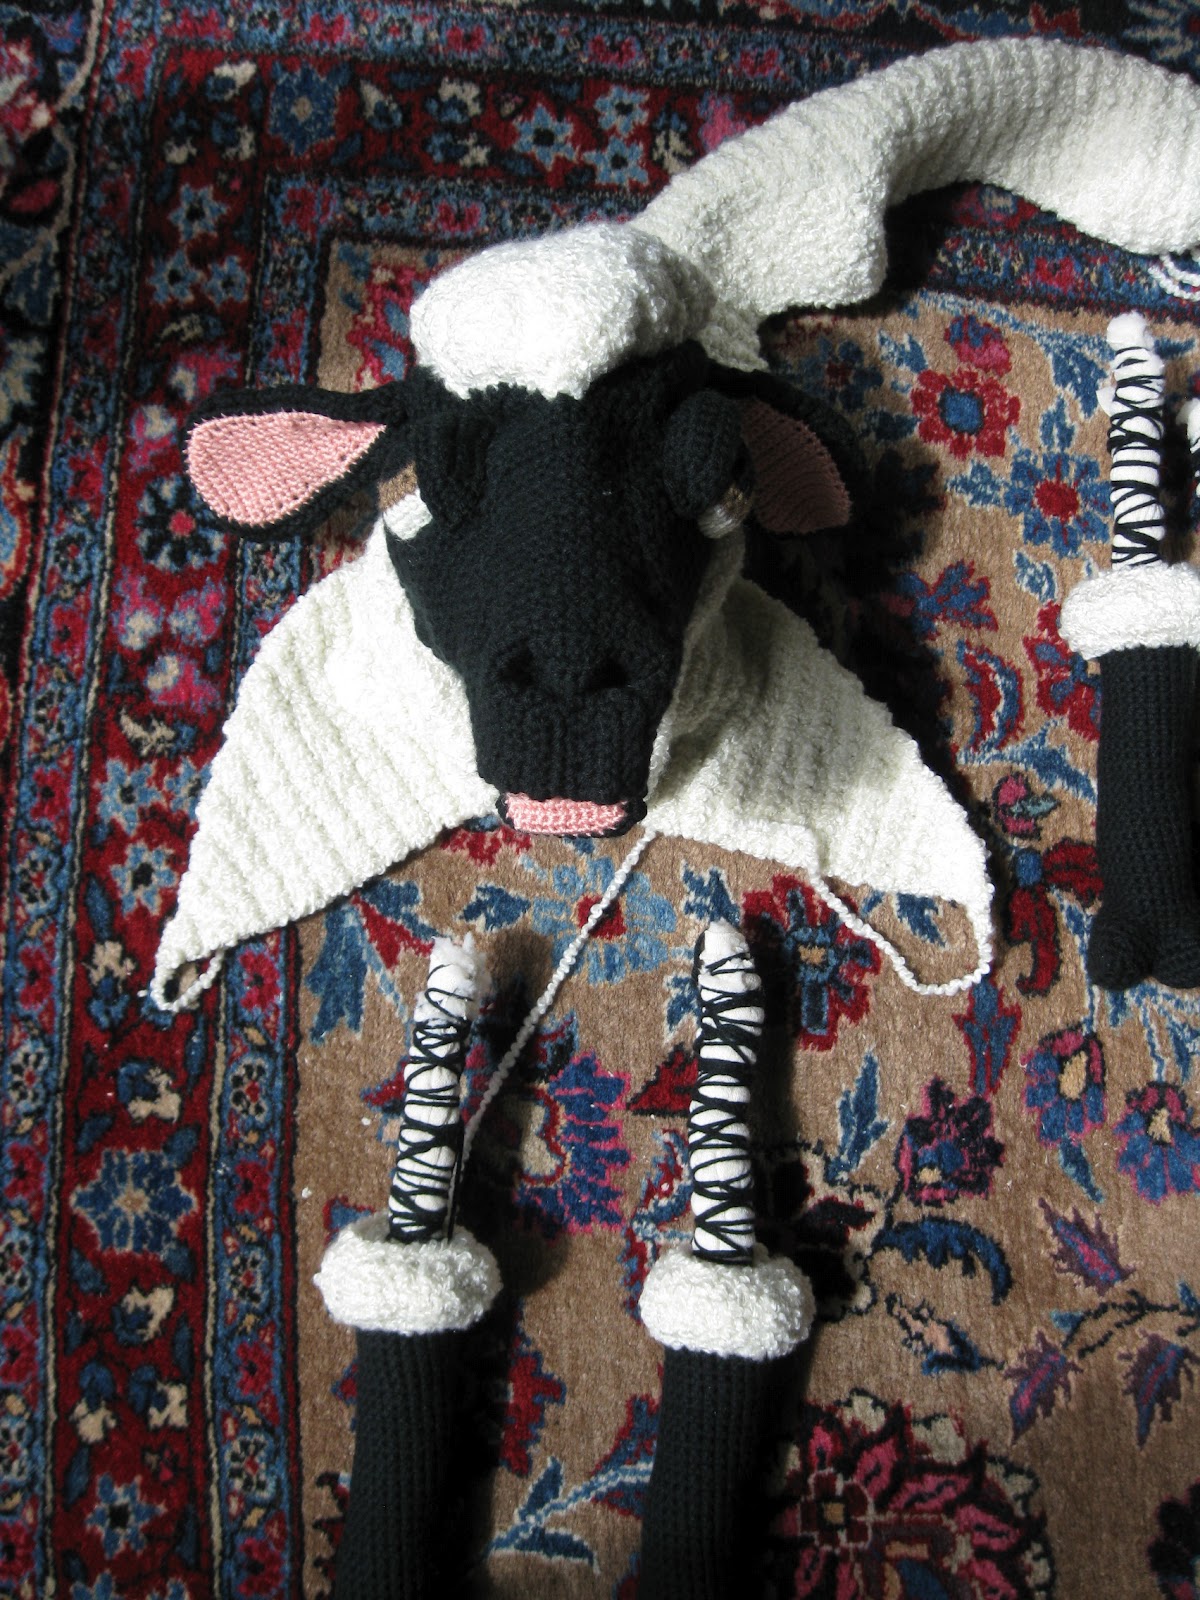
Call me a traditionalist, but I thought some legs were in order.


In order for the sheep to stand, there must be supports in the legs.  I always try to keep all the materials in stuffed animals wash and dryable, so the support system should ideally be somehow fabric and fiber based.  Here I am using rolled up fleece (left over from a Halloween costume) that is tightly bound with yarn.  Besides, I feel there is some poetry in the sheep's internal stuffing being fleece.  Okay, bad poetry.


After the head got finished, I started adding on the floof.  My methods for the body are almost always the same.  I like to work on the dorsal side first, anterior to posterior.  The only exception to this is anything with radial instead of lateral symmetry.


It has been a while since I used yarn like this white boucle.  I forgot why I hate using it so much.  There is just so much fluff that I can't see where my stitches are.  This means that I will need to focus less on the number of the stitches and more on the general shapes that I am making.  I suppose that this is for the best and will force me to be more sculptural.  The good news about this yarn is it makes big stitches.  So hopefully I will get done soon.


Back to work!

Monday, August 20, 2012

Kwick Books: The Pamphlet

Look at me, all avoiding copyright infringement and whatnot...

Alright, so one of the most versatile and easy little books is the pamphlet.  It does not require any gluing and it is perfect for joining just a few pages.  I use this binding for programs, menus, a long card (you need multiple pages in your note), and invitations.


1. paper interior:  you need your pages folded and you will be sewing along the fold.  While you should always keep your grain running parallel to the spine, you can get away with not doing that here because this is a glue-less binding.
2. cover material:  could be just about anything...cloth, paper, whatever.  I am using yellow paper and then a paper doilie.
4. binding string:  again, you can play around here and use thread, yarn, ribbon, or just anything that can hold a knot.  I am using some bamboo yarn. 
5. sewing needle
6. bone folder
7. awl
8. paper knife or scissors
9.  self healing mat (or some surface that you doing mind poking holes in)


Use the bone folder to fold your paper and assemble the spreads (your folded sheets) with the interior spreads on the bottom and your cover on top.


Use your awl to poke holes through all paper layers along the spine fold.  You will need three holes total, one in the center and then one towards both the top and the bottom.  There is no set rule for where these need to be, so use the placement as part of your design.


Thread your needle with your yarn/thread/ribbon and go in through the center hole (cover towards interior).  Leave a tail of at least a few inches.  This tail will be part of a knot or a bow, so leave as much as you need for your knot.  After you have gone through the first hole, bring your needle to the top hole and pass through back towards the cover.


Now bring your needle down along the exterior of the spine and enter in the bottom hole, towards the interior pages.  Now that you are back on the inside, go back up to the center hole.  Go through the center hole, back towards the exterior cover of the book. 


You will want to have the tails of your thread running out perpendicular from the long piece of thread that runs the length of the spine, but you want those tails to be running out on opposite sides, away from the spine.  It will look like you made quadrants.  The reason for this is you will want to tie these tails together, making a knot that is on top of the spine thread and this will anchor everything in place.


Just make a pretty bow and you're done!


You could also do everything in reverse, making your tie on the interior of the book.  Normally when you do this, you don't want the bulk of a bow in there, so you would make a little knot and then trim down your tails.

Sunday, August 19, 2012

Suddenly... SHEEP

I was making a sheep as a baby present and then the baby came early... so it looks like it's going to be all sheep all the time for the next few days.  No complaints though.  Making toys is always really gratifying.  Even though all the crocheting is giving me the very attractive 'sausage fingers' look.


Feel free to make a Godfather reference.  Okay, so I always start with the limbs and work towards the trunk.  Right now I am finishing up the head.  I love this awkward time when it looks really ugly and un-cute.  From here, everything that you add to it, makes it look more attractive.  It is interesting how faces look so strange when certain features that we expect to see are missing.  It's like looking at someone sans eyebrows.  Just a little detail that when missing triggers a, "burn it, burn it with fire!!!" response.


Fast forward an hour or so, and a little floof on top of the head makes a big improvement.

So I am going to go back to crocheting.  I just need to settle on a show marathon.  I have been flip-flopping between Top Gear (BBC) and River Monsters lately.  The end result is I want a Jag and I am developing a fear of fish.  Maybe I need to find something more pastoral...something bucolic and sheep-y?

Saturday, August 18, 2012

Paper Grain: The Long and Short of It

That was a little paper humor, emphasis on 'little'.  Anyway, as I sat there watching my paste paper curl into a contorted mess whilst drying, it reminded me to talk about paper grain.


To keep things simple, paper has a grain.  It is made up of fibers, greater in length than width, and these fibers have settled into a more or less uniform alignment in a sheet of paper.  There is much, much more to be said about the types of fibers and methods of paper making.... but each of those factors will make for long posts, nay, for textbooks (yes, I have those textbooks and no, they aren't terribly exciting).

Paper grain is important because it has the potential to ruin any paper project you are working on.  Those fibers that make up the paper will absorb water and swell laterally.  So basically, the grain direction on a piece of paper is like an expansion joint.  The paper will expand/contract along this orientation as it experiences changes in moisture.  If you look at the drying paste papers (above), there is more curling along the length of the paper than the width because the grain is running along the length of the sheet.

You can clearly see the directionality and how paper always wants to do things along its grain when you tear a sheet of paper.


Most commercial papers are grain long, as in, the grain is running down the length of the paper.  When you tear it this way, it is very easy.

But when you try and tear it against the grain, it will want to self correct and run back with the grain.  I started tearing at the top of the sheet and the tear promptly took a turn.


So why does all this matter?

Well, if you put glue, decoupage medium, or just moisture from humidity on paper, you will get swelling and possibly wrinkles if you did not leave room (or just not attach down the far end of the sheet) for the expansion.  If you are making invitations and are mounting things, your invitations will be warped if you do not consistently layer things in a parallel grain direction.  If you are making a book, the grain direction is kept parallel to the spine because glue (i.e. moisture) is applied to the spine and this allows the pages to expand out without wrinkling.  Just something to keep in mind as you start a paper project.