All this making of baby gifts reminds me of this book:
I happened upon this book by chance a while ago and it was just so unique, I had to buy it. It is a lovely thing. This book is the translation/reprint by Charles Plante of the alphabet book made for the young Alfred Bourdier de Beauregard by his uncle Arnaud.
No one is really sure who exactly uncle Arnaud was, but it is clear that he loved his nephew and went through a lot of work to make him this precious gift. Incidentally, the nephew Alfred prized this gift all his life.
Just a ton of work: drawing, painting, then binding. Besides the fact that it is a labor of love, it is such a great window into aristocratic French life post-Revolution. Alfred's family managed to escape death and preserve wealth (though the Chateau de Beaumont de Beauregard was partially burned by peasant mobs) by living a secluded life in this lovely chateau, illustrated in the book. Plus, there are all the other important pictures that seem to be in every alphabet book since the beginning of time.
You always gotta have a rainbow.
More info on this peach of a book:
http://www.powells.com/biblio/1-9780847830107-0
The sheep was supposed to be done today. But then, as always, things happened.
I started stuffing the body and the yarn for the body just kept expanding and expanding (I normally don't use the boucle). Turns out that the sheep is now to scale and that my support system in the legs is now grossly inadequate. So I need to rig something else up and I should finish and start accessorising within a few hours. I think she needs a beret and a scarf.
I am kind of amazed at how big the expansion was. It seriously doubled in size once it got stuffed. See:
This sheep is going for a baby gift and it should out weigh the child for the first few years of its life. While I enjoy giving ridiculous presents, this one was a bit unintentional. It's like giving someone a killer whale; it's awesome....but now I have a killer whale...
Envelope liners are great way to dress up a basic envelope. It is a pretty basic process that only requires a few materials.
The principle is simple: you have an envelope, cut out a liner, and then you find some way to stick the liner in the envelope.
So take your envelope and trace the outline onto the paper that you want to use as a liner.
I generally line things up so the liner paper is about 1/8-1/4 inches shorter than the envelope (height-wise) because you won't see this edge of the liner (it is in the bottom of the envelope) and while there is no problem if your liner is a little short, there is a big problem if it is a little long. As your liner is going to be more or less hidden on the inside of the envelope, this is a great opportunity to use paper that may have a crumple or a mark on a portion of it.
You can line up the envelope (width-wise) with the edge of your liner paper, even past the edge, because you are going to draw your cut lines on the interior of the envelope outline. Though you don't have to do all your mark making on the reverse side of your liner paper, I think it is best to do so, just so you won't have to worry about seeing these marks later.
Deciding where your cut lines are going to go is really up to you. The biggest factor is the gum on the envelope flap. This is what keeps your envelope sealed, so it is best not to cover it. Aesthetically, I like to keep the overall board equal from the tops to the side, but you do what you want.
Just cut out along the lines. If you are using a paper with a very fine fiber, it is much faster to use a metal ruler to rip your paper (plus you get a soft, deckle-like edge) instead of using scissors to cut it out. Also, if you are doing this en masse, you should make a template to trace around for the liner out of chipboard/card stock to save time.
After you have your liner cut out, you just have to adhere it in the envelope. This is the most tricky part. Well, not so much tricky, but you do have some choices. The most important thing is that you only put adhesive on the liner on the portion of the liner that will be on the flap of the envelope. If you put the adhesive lower, on the envelope body, then you will have bunching and wrinkling when you fold down the flap. Just not attractive.
The main question here is picking out your adhesive. I am using ATG tape. There are other adhesives that you could use, depending on the papers that you are using, but ATG tape, or another double sided tape, will always work for everything. Basically, glue stick or any type of liquid tape will show if you are using delicate papers, vellum, or coated papers (like metallic). It will look really bad. And here, I am using a delicate paper as my liner and a metallic paper for my envelope. So I just use ATG tape for everything when I am doing invitations and cards. I should also mention that the ATG gun is pretty expensive, but if you are doing a big project, it becomes cheaper than any other type of tape very fast.

Alright, now slip the liner into the envelope being careful not to stick the liner down until you have it in its final position. Do not fold over your flap until you have your envelope stuffed!! If you fold it over right now, the fold will be in the wrong place and when you fold later, when the envelope is stuffed, you have a funky looking double-fold. So just hold tight.
Okay, now your envelope is full and ready for mailing. Fold down and seal. Get that guy in the mail and prepare to hear back on how awesome it looks.
This is one of those tricks that turns really inexpensive materials into something really special.
I hate keeping around piles of wrapping paper. To have themed paper for every occasion just adds up to a ginormous quantity.
So I just use that kraft postal wrap. Yes, I know, it is super trendy and everyone is using it right now. But there is some good sense behind this trend. You can get a huge roll of the stuff for not much money. I would recommend buying your rolls during the summer. If you try to buy during the holidays, it will become a knife fight between you and several other people as you fight for the last roll. No joke, this stuff evaporates by Thanksgiving and then all the hipsters who did not plan ahead start panicking as they realize they will have to use mainstream wrapping materials. Much gnashing of teeth ensues.
You can decorate your papers to fit the occasion. Generally, if I am going to decorate the paper, I will not go crazy with ribbons and other decorations, but more on wrapping for another post.
Today, I am just going to do written decoration and save stamping for another day. You can use markers, pens, anything really. To be honest, you don't even need to have nice handwriting. Personally, I think that this is one of those occasions where more sloppy script looks more natural and so the sentiment seems more earnest. I would say, though, that if your writing is illegible, then remember it is going to turn into a pattern as opposed to written communication. But this is a good opportunity to practice one's penmanship. Maybe even practice your 'kid' handwriting, which is something I struggle on.
I am using China ink and watered down acrylic paint as my inks and a brush as my stylus for this batch of paper.
It's pretty basic, just roll out a stretch and start writing. Just make sure that you are making enough for whatever you need to wrap.
Sometimes I like to write out a poem that I know will be special to the recipient, but you really can't go wrong with just an 'I love you'.
Today is a big day. I am officially calling it the 'new year' for the new growing cycle for my Lithops.
Each year, a new pair of leaves emerge on a Lithops. This year, there are TWO pairs!! I am thrilled. Well, I am just thrilled any time something isn't dying under my watch. This particular Lithops I think is a karasmontanas var., but I can't be totally sure because I purchased it unidentified. This little guy, guys now, are planted in carnelian and agates that I have been collecting from my local beach. Since Lithops are generally colored to match the surrounding rocks in their natural habitat, I wanted to try to make a gesture towards authenticity. Just for this once anyway.

It isn't good news for all my Lithops, though. Karasmontanas' next door neighbor (above) is slowly dying. I bought it from a very commercial, cheap distributor who planted it in improper medium. Instead of being in a fast draining rock mix, it was in potting soil with a bit of sand. As such, I had been avoiding watering them. Now it is starting to shrivel, which means it needs water. So I tried to remove as much of the old soil as possible and replant them in my own substrate (combination of pumice pebbles and shell) before watering. I am afraid that there is still too much of the old soil left on the roots and so it is holding onto the water and rotting the roots. We'll see if they can bounce back.

Plants can just be so mysterious sometimes. I have spent months watering and watching my Pachypodium rosulatum, waiting for something to happen. I had one new leaf last month. That's it. But I was looking at it today and noticed all these new little branches starting to form. No idea how that is going to work out as the growing season is almost over. In another month or so, there will be no more watering until spring. This guy is perched in a mound of fossilized coral. I wish I had more of it, but this is the last of my stock pile from when I lived on the East coast.
At the suggestion of my friend and planting guru, Emily Stuart (see footnotes), I have started keeping a plant journal. Since all my plants seem to have very specific growing needs and are all running on different calenders, I need to keep a record of their life cycles. With a lot of these specimen succulents, they don't live by the seasons where you live, but by the seasons and climatic cycles from where their species originated. And then some of them seem to hate on their growers. Nothing like being rejected by a house plant.
Read more from the famous Miz. Stuart:
http://natureassassin.blogspot.com/
I have a few friends that I exchange shall we say, unusual gifts with. Keeping things original and obscure can be a challenge sometimes. The stakes are even higher when the gift is for some big life event.
So when confronted with an appropriate wedding gift, some thought was required. I always like giving blankets; they are just a physical manifestation of warm, fuzzy thoughts, you know? And so I made the toast blanket.
But as this was for a wedding, I included a floor pillow in the form of a pat of butter. No judgement on who is who.
I also figured that the butter would work as a sleeping pillow for their cat, but as expected, the cat was more interested in sleeping on the wrapping paper than on the bed. Why cat, why? Why do you shun my attentions??
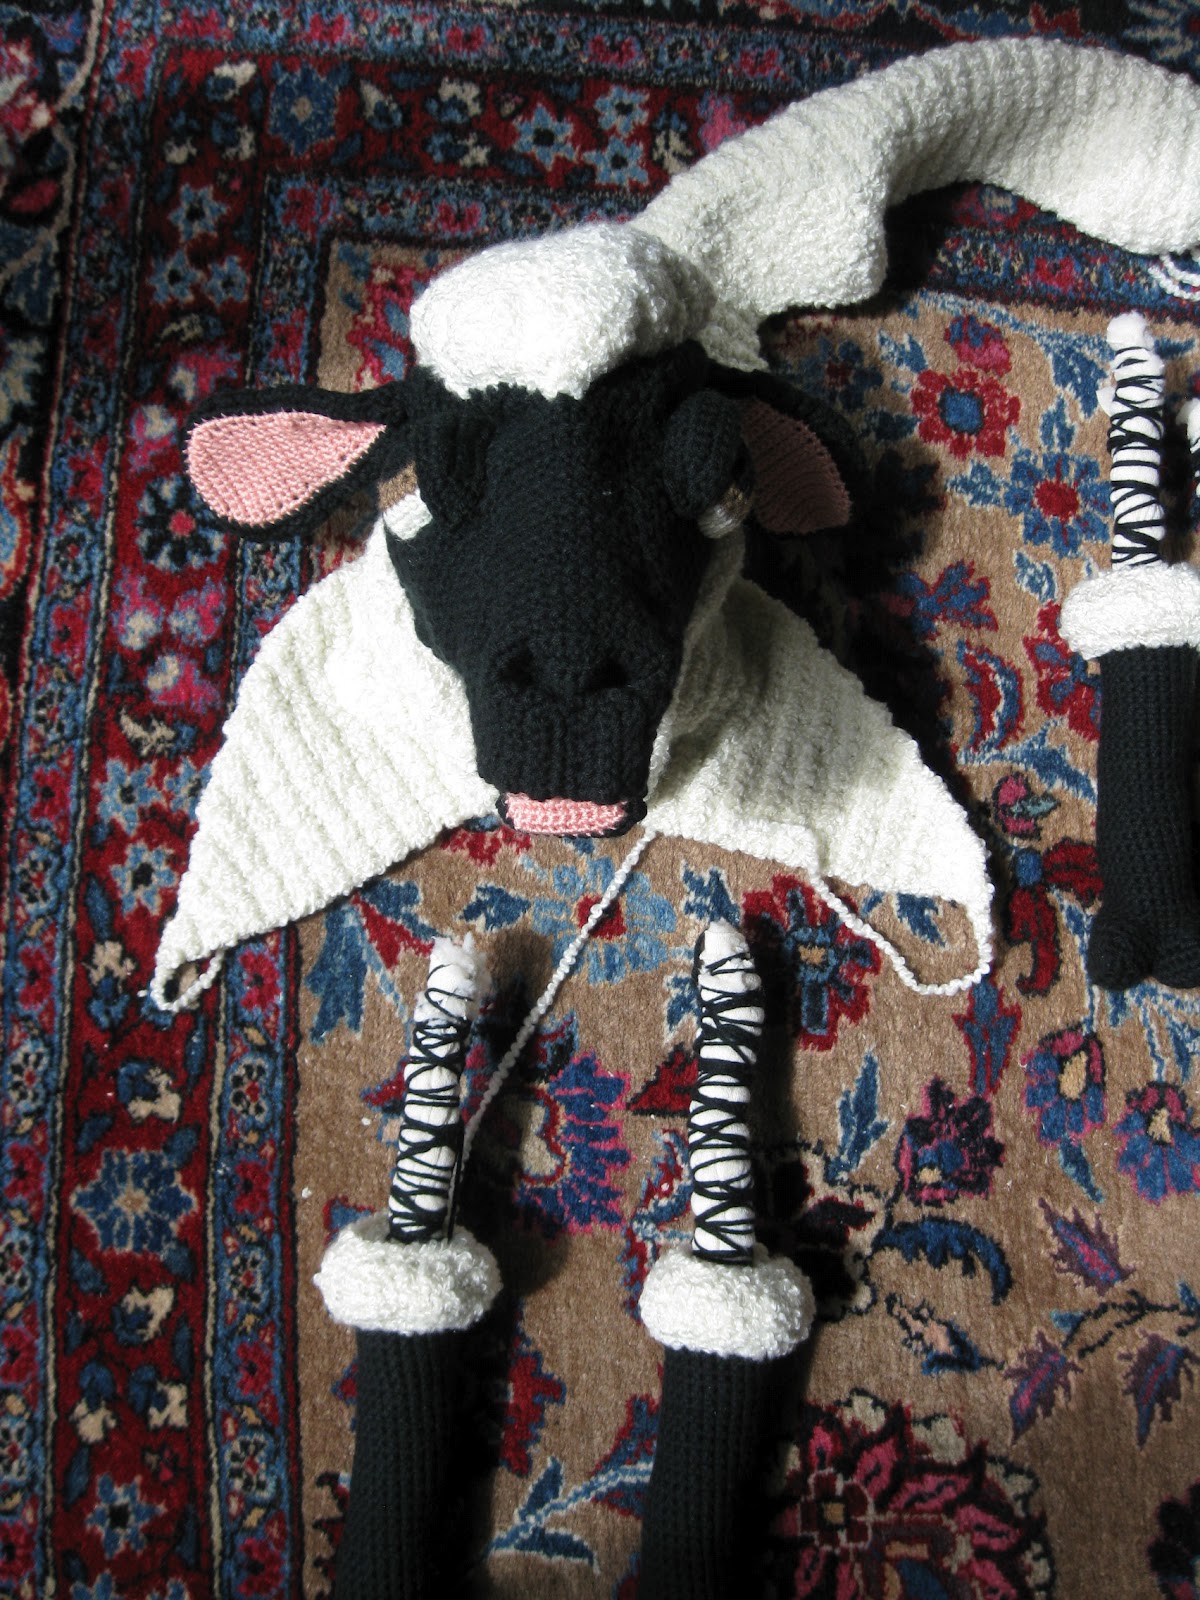
Call me a traditionalist, but I thought some legs were in order.
In order for the sheep to stand, there must be supports in the legs. I always try to keep all the materials in stuffed animals wash and dryable, so the support system should ideally be somehow fabric and fiber based. Here I am using rolled up fleece (left over from a Halloween costume) that is tightly bound with yarn. Besides, I feel there is some poetry in the sheep's internal stuffing being fleece. Okay, bad poetry.
After the head got finished, I started adding on the floof. My methods for the body are almost always the same. I like to work on the dorsal side first, anterior to posterior. The only exception to this is anything with radial instead of lateral symmetry.
It has been a while since I used yarn like this white boucle. I forgot why I hate using it so much. There is just so much fluff that I can't see where my stitches are. This means that I will need to focus less on the number of the stitches and more on the general shapes that I am making. I suppose that this is for the best and will force me to be more sculptural. The good news about this yarn is it makes big stitches. So hopefully I will get done soon.
Back to work!